Last Updated on 17/11/2025
Technitium DNS Server is an open source authoritative as well as recursive DNS server that can be used for self hosting a DNS server for privacy & security. It works out-of-the-box with no or minimal configuration and provides a user friendly web console accessible using any modern web browser.
Personally I have switched from Pi-hole to Technitium in 2024.
Using docker compose
Make a directory, for example named technitium, and create a docker-compose.yml file in that folder. Add the config below.
services:
  dns-server:
    container_name: dns-server
    hostname: dns-server
    image: technitium/dns-server:latest
    # For DHCP deployments, use "host" network mode and remove all the port mappings, including the ports array by commenting>
    # network_mode: "host"
    ports:
      - "5380:5380/tcp" #DNS web console (HTTP)
      # - "53443:53443/tcp" #DNS web console (HTTPS)
      - "53:53/udp" #DNS service
      - "53:53/tcp" #DNS service
      # - "853:853/udp" #DNS-over-QUIC service
      - "853:853/tcp" #DNS-over-TLS service
      # - "443:443/udp" #DNS-over-HTTPS service (HTTP/3)
      # - "443:443/tcp" #DNS-over-HTTPS service (HTTP/1.1, HTTP/2)
      # - "80:80/tcp" #DNS-over-HTTP service (use with reverse proxy or certbot certificate renewal)
      # - "8053:8053/tcp" #DNS-over-HTTP service (use with reverse proxy)
      # - "67:67/udp" #DHCP service
    environment:
      - DNS_SERVER_DOMAIN=dns-server #The primary domain name used by this DNS Server to identify itself.
      # - DNS_SERVER_ADMIN_PASSWORD=password #DNS web console admin user password.
      # - DNS_SERVER_ADMIN_PASSWORD_FILE=password.txt #The path to a file that contains a plain text password for the DNS web>
      # - DNS_SERVER_PREFER_IPV6=false #DNS Server will use IPv6 for querying whenever possible with this option enabled.
      # - DNS_SERVER_WEB_SERVICE_HTTP_PORT=5380 #The TCP port number for the DNS web console over HTTP protocol.
      # - DNS_SERVER_WEB_SERVICE_HTTPS_PORT=53443 #The TCP port number for the DNS web console over HTTPS protocol.
      # - DNS_SERVER_WEB_SERVICE_ENABLE_HTTPS=false #Enables HTTPS for the DNS web console.
      # - DNS_SERVER_WEB_SERVICE_USE_SELF_SIGNED_CERT=false #Enables self signed TLS certificate for the DNS web console.
      # - DNS_SERVER_OPTIONAL_PROTOCOL_DNS_OVER_HTTP=false #Enables DNS server optional protocol DNS-over-HTTP on TCP port 80>
      - DNS_SERVER_RECURSION=Allow #Recursion options: Allow, Deny, AllowOnlyForPrivateNetworks, UseS>
      # - DNS_SERVER_RECURSION_DENIED_NETWORKS=1.1.1.0/24 #Comma separated list of IP addresses or network addresses to deny >
      # - DNS_SERVER_RECURSION_ALLOWED_NETWORKS=127.0.0.1, 192.168.1.0/24 #Comma separated list of IP addresses or network ad>
      - DNS_SERVER_ENABLE_BLOCKING=true #Sets the DNS server to block domain names using Blocked Zone and Block List Zone.
      - DNS_SERVER_ALLOW_TXT_BLOCKING_REPORT=true #Specifies if the DNS Server should respond with TXT records containing >
      - DNS_SERVER_BLOCK_LIST_URLS=!https://raw.githubusercontent.com/anudeepND/whitelist/master/domains/whitelist.txt, https://big.oisd.nl/, https://blocklistproject.github.io/Lists/ads.txt, https://blocklistproject.github.io/Lists/fraud.txt, https://blocklistproject.github.io/Lists/malware.txt, https://blocklistproject.github.io/Lists/phishing.txt, https://blocklistproject.github.io/Lists/ransomware.txt, https://blocklistproject.github.io/Lists/scam.txt, https://phishing.army/download/phishing_army_blocklist_extended.txt #A comma separated list of block list URLs.
      - DNS_SERVER_FORWARDERS=1.1.1.1, 1.0.0.1 #Comma separated list of forwarder addresses.
      # - DNS_SERVER_FORWARDER_PROTOCOL=Tls #Forwarder protocol options: Udp, Tcp, Tls, Https, HttpsJson.
      # - DNS_SERVER_LOG_USING_LOCAL_TIME=true #Enable this option to use local time instead of UTC for logging.
    volumes:
      - config:/etc/dns
    restart: unless-stopped
    sysctls:
      - net.ipv4.ip_local_port_range=1024 65000

volumes:
    config:
Then all you need to do is run docker compose up -d and login on servers IP address at port 5380.
Using Automated Installer / Updater
Automated installer script can be used to install or update the DNS Server. The automated installer script has been tested on following distros:
- Ubuntu Server (x64)
- Ubuntu Desktop (x64)
- Raspbian (Buster) (ARM32)
- CentOS 8.2 (2004) (x64)
- Fedora Server 32 (x64)
The installer script may work on other distros and platforms as well.
curl -sSL https://download.technitium.com/dns/install.sh | sudo bashBlocking
To block ads, malware, fraud, phising, tracking and so on you can go to Settings -> Blocking.
Here are the blocklists I’m personally recommend using.
!https://raw.githubusercontent.com/anudeepND/whitelist/master/domains/whitelist.txt
https://big.oisd.nl/
https://blocklistproject.github.io/Lists/ads.txt
https://blocklistproject.github.io/Lists/fraud.txt
https://blocklistproject.github.io/Lists/malware.txt
https://blocklistproject.github.io/Lists/phishing.txt
https://blocklistproject.github.io/Lists/ransomware.txt
https://blocklistproject.github.io/Lists/scam.txt
https://phishing.army/download/phishing_army_blocklist_extended.txt
Settings
In the settings section we’ll show you how to encrypt the DNS requests from your network to the Internet, amongst other recommended security features.
General
Under general make sure that DNSSEC is enabled.

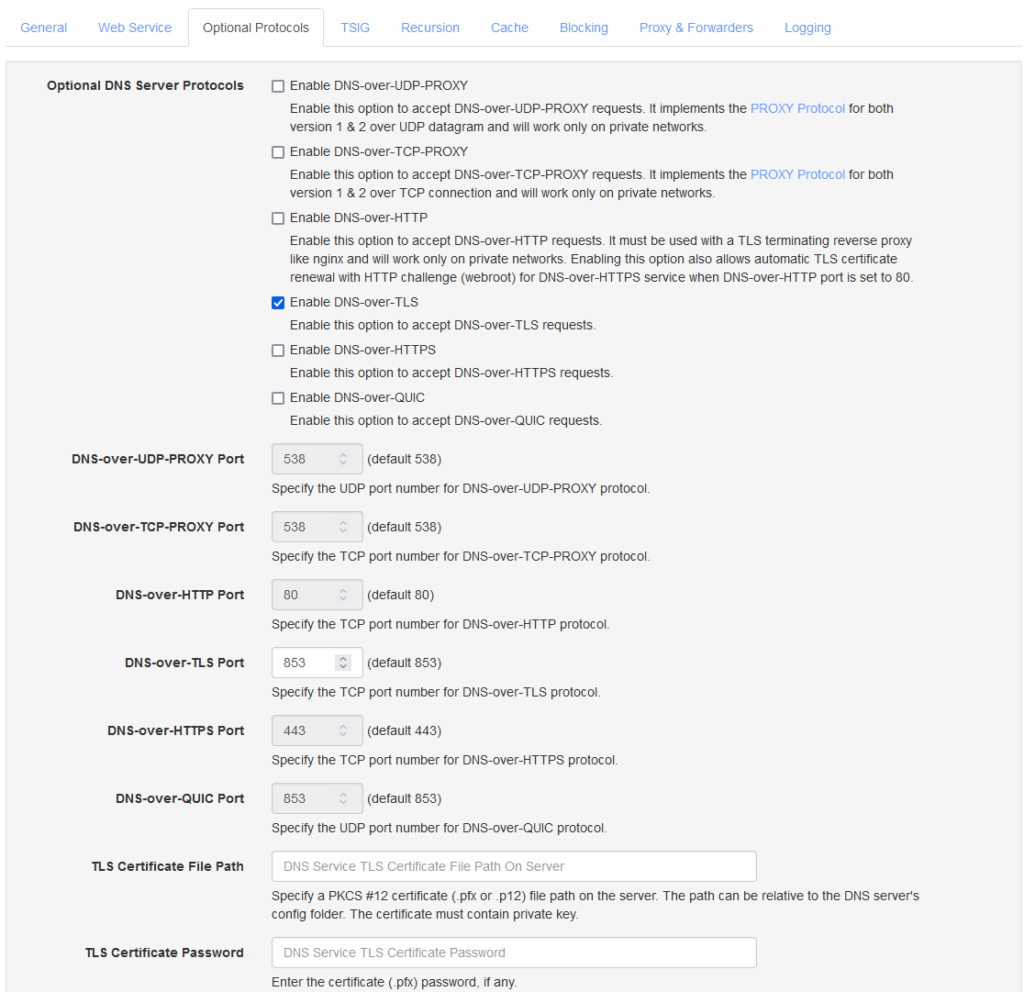
Optional Protocols
In this section you can turn on DNS-over-TLS and such for your local network. If you have any local device configured to lookup DNS over TLS, then enable it on this page.

Proxy & Forwarders
We recommend that you turn DNS-over-TLS on. This makes sure that all DNS requests going out from your network to the Internet is encrypted.
Choose the forwarder of your choice. In this example we have picked Cloudflare. And then under forwarder protocol you choose DNS-over-TLS.

